
To use a self-watering pot, assemble its insert or wick correctly, plant in a compatible growing mix, and fill the reservoir only to the level specified for that model. Check both the stored water and the moisture around the roots. Newly planted specimens may still need watering from above while they establish; a full reservoir does not prove the root ball is getting water.
For Indian homes, the useful habit is to observe how your particular plant and pot behave in their actual position. A sunny balcony, a humid room and an air-conditioned office will not empty the same reservoir at the same rate.
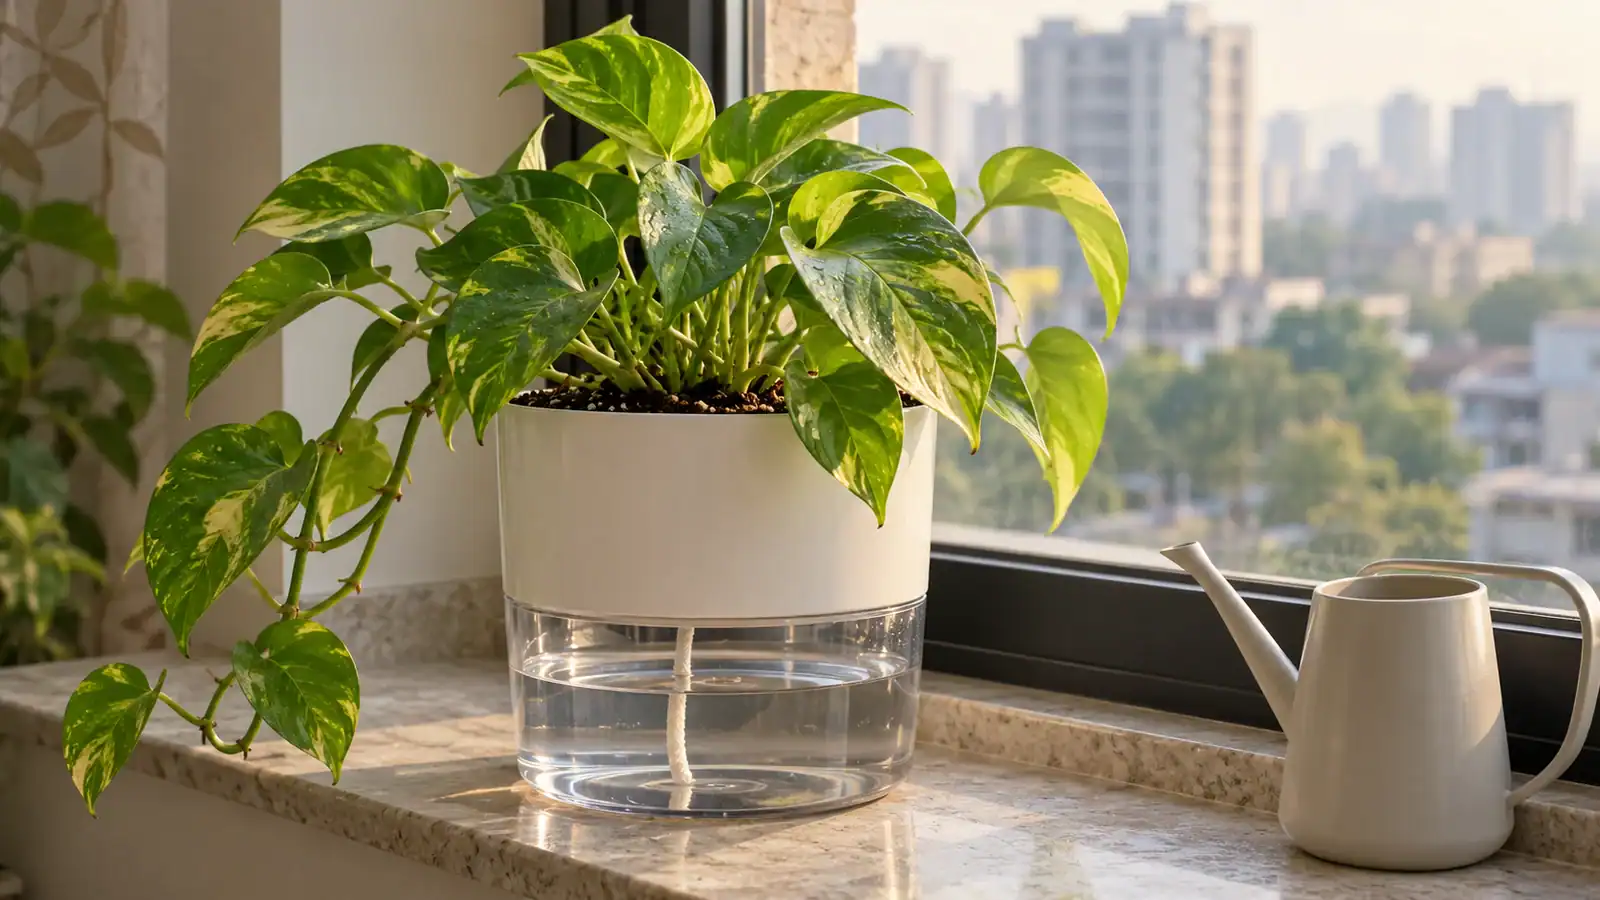
How do self-watering pots work?
A reservoir stores water below the planting section. Depending on the design, a wick or a column of growing medium carries moisture upward. University of Maryland Extension describes a common arrangement with a perforated platform over the reservoir and an overflow outlet that limits excess water. Source: Maryland self-watering container guide.
The important word is design. A rope-wick tabletop planter, a large outdoor reservoir tub and a nursery pot standing inside a decorative cover are not interchangeable systems. A pot inside an outer cover does not become self-watering just because water collects below it.
| Part | Purpose | What to check |
|---|---|---|
| Planting insert or platform | Holds the growing mix in the intended position. | It is seated correctly; reservoir space has not been filled with soil. |
| Wick or wicking section | Provides a path for moisture to reach the mix. | It is installed exactly as the instructions show. |
| Water reservoir | Stores water for later use. | You can inspect and refill it without guessing the level. |
| Fill point, indicator or overflow | Helps manage water in models that include it. | You know which opening serves which function. |
Do not drill a hole, remove a plug or block an opening based on instructions for another brand. If you cannot identify the fill route or permitted water level, get the assembly instructions before planting.
How do you set up a self-watering pot for the first time?
1. Match the plant to the moisture pattern
Choose for the plant’s needs, not simply for the convenience of a reservoir. Mayne’s own planter guide cautions that continuously moist systems are unsuitable for plants such as cacti and succulents that do not thrive in those conditions. Source: Mayne planter guidance. Even when a plant is a reasonable candidate, its potting mix and location still matter.
2. Assemble and inspect before adding soil
Fit the supplied insert, wick and other components according to the model’s instructions. Check that the reservoir is clean and the parts fit securely. If a wick needs preparation, follow the supplied method rather than improvising a replacement cord or changing its length.
Test access to the reservoir while the pot is empty. A refill opening that is awkward now may become harder to reach once stems and leaves cover it. Keep the instructions or a photograph of the assembled parts with your plant notes.
3. Use a compatible container-growing mix
Use the growing medium recommended for the planter and plant. Dense soil packed tightly into a small container can restrict air and water movement; University of Minnesota Extension highlights that limitation of heavy soils in containers. Source: Minnesota container guidance. Conversely, do not assume that a very coarse mix will connect effectively with every wick.
Our container potting mix guide explains the physical checks behind a mix. Its vegetable recipe is not a universal specification for reservoir planters or houseplants; compatibility with your system takes priority.
4. Plant without burying the reservoir
Keep the plant at its appropriate planting depth, with growing room suited to its root ball and mature size. Put mix in the intended planting compartment. Do not pour loose soil into a clear lower water chamber just because it looks like unused pot space.
5. Establish moisture around the roots
Follow the initial watering procedure supplied with the planter. Mayne, for example, calls for regular watering during the first couple of weeks while roots establish. That is guidance for its systems, not a fixed waiting period for every pot. Source: Mayne. Check the existing root ball as well as the new surrounding mix before relying on reservoir supply.
6. Fill to the model’s specified level
Use the intended fill point or refill method. Observe the maximum mark or indicator if one is provided. A reservoir should not be filled to the brim simply because there is room for more water. Preserve the separation and overflow arrangement specified for that model.
Record the date, starting level and moisture condition. These three observations are more useful than assuming a manufacturer’s general description predicts how many days your particular plant can be left alone.
When should you refill a self-watering pot?
Check the reservoir level and root-zone moisture together, then follow the model’s refill instructions and the plant’s requirements. An empty chamber does not automatically mean dry roots; a full chamber does not guarantee that water is reaching them.
University of Maryland Extension advises watering indoor plants according to need rather than a fixed schedule, because medium, humidity and temperature affect demand. Source: Maryland indoor-plant watering guidance. The same observation habit helps you decide how a reservoir is performing.
- Reservoir low, mix still appropriately moist: assess whether it needs a refill now under your system’s instructions. Do not keep topping up just to maintain a full-looking chamber.
- Reservoir contains water, root ball drying: investigate the wick, assembly and mix connection. Adding still more reservoir water may not solve the delivery problem.
- Mix persistently saturated: review the fill level, medium and plant suitability before continuing the same routine.
- Water disappearing unusually fast: check for leaks or spillage as well as increased plant demand.
During the first few days, inspect often enough to learn the system. If you plan to travel, observe it through a representative period at home first. Do not turn a trial under cool indoor conditions into a promise that the same pot will last through a hot, windy week outdoors.
How should you adjust use in Indian homes?
Think in terms of the plant’s immediate conditions rather than nationwide season dates. Maryland’s container guide notes that sun, wind, container size and plant maturity affect drying, while an overhang can keep rain away from a pot. Source: Maryland container-growing guidance.
- Hot, dry northern or western conditions: watch the actual rate of reservoir use and avoid assuming yesterday’s level change will remain constant through hotter weather.
- Humid coastal rooms or a rainy spell: check the mix before adding water. A reservoir is not a reason to ignore a pot that stays wet.
- Rain-exposed balconies, including southern northeast-monsoon periods: confirm outdoor suitability and overflow operation. Use a sheltered position if the model cannot safely handle rain; do not invent a drainage modification.
- Cool hill homes or a dim winter position: reassess use as light and growth change. A calendar reminder should prompt a check, not an automatic refill.
- Air-conditioned offices: monitor the actual placement, including airflow, rather than treating all indoor pots as one watering group.
Choose appropriate light separately from the watering system. Our indoor plant placement guide covers that decision. A reservoir cannot compensate for unsuitable light.
What if the plant struggles in a self-watering pot?
| Observation | First check | Practical response |
|---|---|---|
| Dry root ball, water below | Wick placement, assembly and mix contact. | Restore the intended connection and follow the initial watering procedure if required. |
| Wet mix and yellowing leaves | Water level, plant requirements and how long the mix remains wet. | Assess the setup; do not diagnose from leaf colour alone. |
| Water on the furniture | Overflow route, cracks, loose parts or a refill spill. | Resolve the cause and test the planter before returning it to that surface. |
| Odour, debris or deposits | Reservoir cleanliness and the feed/water routine. | Clean accessible components by the manufacturer’s method; review the medium if the problem persists. |
The RHS’s hanging-basket research lists overly wet compost and deteriorating wicking as possible disadvantages of self-watering systems. Its findings also emphasise that irrigation systems still need monitoring and adjustment. Source: RHS watering research. Those observations do not establish the performance of a particular tabletop model.
If you see yellow leaves on a money plant, use our money plant yellow-leaf checks to separate possible causes rather than adding fertiliser automatically.
Should fertiliser go into the reservoir?
Only when the planter instructions and fertiliser label support that method, at the stated dilution. Account for feed already in the mix. Maryland Extension explains that dissolved salts can accumulate as water evaporates and affect water uptake. Source: Maryland. Follow a compatible cleaning or flushing procedure; do not pour concentrated feed into the chamber as a shortcut.
What should you check before buying?
Compare the usable planting dimensions, reservoir access, assembly instructions, cleaning method and indoor/outdoor suitability. Visible storage is useful for checking a level, but it does not tell you whether the growing mix is correctly hydrated.
Surekha Agro’s Self Watering Square Pots, Pack of 2 in Green and Brown are listed with a visible lower reservoir. Confirm the dimensions, supplied components and operating instructions before matching them to your plant. The round wick planter shown above is a general example, not an assembly illustration for that square model.
Frequently asked questions
Can a self-watering pot overwater a plant?
Yes, a poorly matched or incorrectly operated system can leave the mix too wet. Check the plant, medium, fill level and overflow arrangement rather than assuming the name prevents every watering problem.
Do I ever water from the top?
Some systems call for it during establishment or maintenance; others have a specific reservoir-only routine once operating. Use the instructions for your model and assess the root ball. Advice for one design should not override another’s manual.
Should I keep the reservoir full all the time?
Do not make that a universal rule. Follow the specified refill method and level, and observe the plant and mix. Different models and plant needs can require different routines.
Will it water my plants for 15 days while I am away?
No reliable duration follows from the name alone. Reservoir capacity, plant size, mix and conditions all matter. Test the actual setup beforehand and arrange someone to check it if you cannot establish a dependable margin.
Before your next refill: look at the stored water, check moisture where the roots are, and confirm that the water path is working. Those checks make a self-watering pot useful without turning it into a guessing game.